Клонируйте репозиторий GitHub, поддерживающий эту статью, запустив следующие команды:
git clone https://github.com/Tonel/how-to-pixelate-an-image-img-lyЗатем откройте файл index.html, чтобы сразу попробовать демо-приложение.
Или продолжайте читать этот учебник и шаг за шагом создайте демонстрационное приложение.
1. Реализация логики пикселизации
Поскольку вы можете достичь желаемой цели только с помощью элемента HTML5 <canvas>, предварительных условий нет. В частности, этот элемент HTML позволяет вам извлечь массив пикселей, представляющих изображение, с помощью функции getImageData(). А это то, что нужно для пикселизации изображения. Давайте посмотрим, как подробно:
function pixelateImage(originalImage, pixelationFactor) {
  const canvas = document.createElement("canvas");
  const context = canvas.getContext("2d");
  const originalWidth = originalImage.width;
  const originalHeight = originalImage.height;
  const canvasWidth = originalWidth;
  const canvasHeight = originalHeight;
  canvas.width = canvasWidth;
  canvas.height = canvasHeight;
  context.drawImage(originalImage, 0, 0, originalWidth, originalHeight);
  const originalImageData = context.getImageData(
    0,
    0,
    originalWidth,
    originalHeight
  ).data;
  if (pixelationFactor !== 0) {
    for (let y = 0; y < originalHeight; y += pixelationFactor) {
      for (let x = 0; x < originalWidth; x += pixelationFactor) {
        // extracting the position of the sample pixel
        const pixelIndexPosition = (x + y * originalWidth) * 4;
        // drawing a square replacing the current pixels
        context.fillStyle = `rgba(
          ${originalImageData[pixelIndexPosition]},
          ${originalImageData[pixelIndexPosition + 1]},
          ${originalImageData[pixelIndexPosition + 2]},
          ${originalImageData[pixelIndexPosition + 3]}
        )`;
        context.fillRect(x, y, pixelationFactor, pixelationFactor);
      }
    }
  }
  originalImage.src = canvas.toDataURL();
}
Во-первых, инициализируется HTML <canvas> в памяти с контекстом 2D-рендеринга, имеющим тот же размер, что и исходное изображение, подлежащее пикселизации. Далее исходное изображение отрисовывается на холст с помощью функции drawImage(). Это необходимо для вызова функции getImageData(), которая позволяет получить список пикселей. Сделайте это, обратившись к атрибуту data. Вы получите одномерный массив, содержащий значения пикселей в порядке RGBA. В частности, он хранит значения в виде целых чисел от 0 до 255, и каждый пиксель представлен 4 последовательными значениями. Таким образом, размер этого массива будет в 4 раза больше числа пикселей.
Затем пиксели повторяются с использованием pixelFactor в качестве коэффициента приращения. Другими словами, эта переменная используется для извлечения образца пикселя, четыре значения RGBA которого будут использоваться для рисования квадрата. Эти квадраты придадут изображению пиксельный эффект. Таким образом, в конце циклов изображение будет выглядеть пиксельным.
И вуаля! Как вы только что узнали, для пикселизации изображения в ванильном JavaScript требуется всего несколько строк кода.
2. Пикселизация в действии
Давайте теперь посмотрим, как использовать функцию pixelateImage() для реализации реального примера.
<!DOCTYPE html> <html> <body> <h1>Pixelate an Image</h1> <p> Upload an image or pixelate the following demo image </p> <input id="upload" type="file" accept="image/*" /> <div> <img style="margin-top: 5px;" id="pixelatedImage" src="demo.jpg" crossorigin="anonymous" /> </div> <div style="margin-top: 5px;"> <span>Pixelation: </span> <input type="range" min="0" max="10" value="0" step="1" class="pixelation" id="pixelationRange" /> </div> <script src="src/index.js"></script> </body> </html>const fileInput = document.querySelector("#upload"); const pixelatedImage = document.querySelector("#pixelatedImage"); // storying a copy of the original image const originalImage = pixelatedImage.cloneNode(true); const pixelationElement = document.querySelector("#pixelationRange"); fileInput.addEventListener("change", async (e) => { const [file] = fileInput.files;// showing the uploaded image pixelatedImage.src = await fileToDataUri(file); // storing the original image originalImage.src = await fileToDataUri(file); pixelationElement.value = 0;return false; }); pixelationElement.oninput = (e) => { pixelateImage(originalImage, parseInt(e.target.value)); }; function fileToDataUri(field) { return new Promise((resolve) => { const reader = new FileReader(); reader.addEventListener("load", () => { resolve(reader.result); }); reader.readAsDataURL(field); }); } function pixelateImage(originalImage, pixelationFactor) { const canvas = document.createElement("canvas"); const context = canvas.getContext("2d"); const originalWidth = originalImage.width; const originalHeight = originalImage.height; const canvasWidth = originalWidth; const canvasHeight = originalHeight; canvas.width = canvasWidth; canvas.height = canvasHeight; context.drawImage(originalImage, 0, 0, originalWidth, originalHeight); const originalImageData = context.getImageData( 0, 0, originalWidth, originalHeight ).data; if (pixelationFactor !== 0) { for (let y = 0; y < originalHeight; y += pixelationFactor) { for (let x = 0; x < originalWidth; x += pixelationFactor) { // extracting the position of the sample pixel const pixelIndexPosition = (x + y * originalWidth) * 4; // drawing a square replacing the current pixels context.fillStyle = rgba( ${originalImageData[pixelIndexPosition]}, ${originalImageData[pixelIndexPosition + 1]}, ${originalImageData[pixelIndexPosition + 2]}, ${originalImageData[pixelIndexPosition + 3]} ); context.fillRect(x, y, pixelationFactor, pixelationFactor); } } } pixelatedImage.src = canvas.toDataURL(); }Thedemo.jpgimage is loaded by default, but users can also upload their images thanks to theinputelement. Then, using the rangeinputthey can change the pixelation and see the effects on the original image. What happens behind the scene is that thechangeevent on the rangeinputis intercepted and used to call thepixelateImage()function. This takes care of pixelating the original image unlesspixelationFactoris 0. In this last case, the original image will be restored. Note that the application implemented here is the same presented in the fiddle above.
Заключительные соображения
No external libraries are required to implement pixelation logic on images in JavaScript. Moreover, this requires nothing more than a few lines of code. This could be used in conjunction with explicit content identification tools, such as Google SafeSearch. On the other hand, performance is a problem. Pixelating an image frontend side takes time and resources. This could put a strain on the end user's device, consequently introducing delays in displaying the pixelated images.
If the pixelation effect did not have to be applied programmatically, you should consider adopting a commercial solution. In this case, performance would not be a problem. There will be no issues because an experienced team of developers would have already optimized the algorithms for you. In this case, you could take advantage of an advanced SDK. And CreativeEditorSDK is the right solution for you. This all-in-one SDK comes with many features, allowing your users to unleash their creativity. So, they will be able to go beyond pixelating an image. Also, if you needed help, you could directly ask the team who built it.
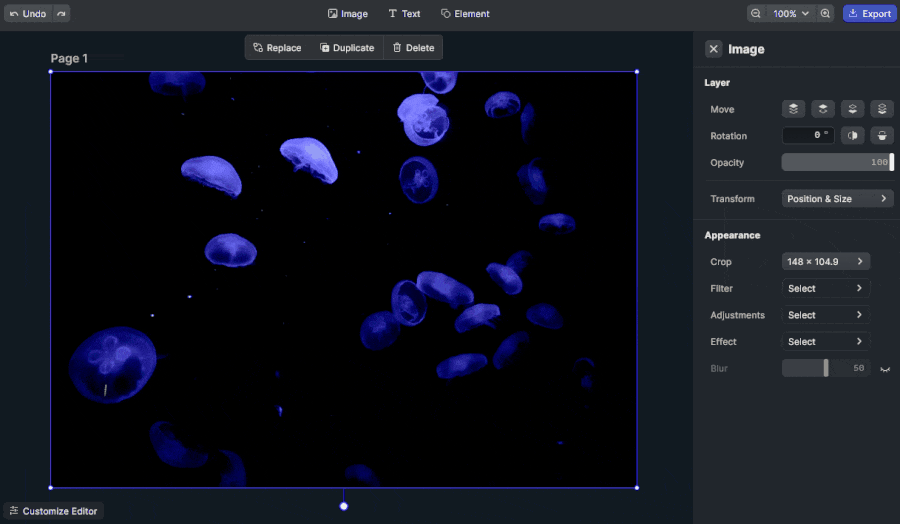
Пикселизация изображения с помощью cesdk-js
First, read this article from the official documentation on how to get started with CreativeEditorSDK in Vanilla JavaScript. Then, by selecting an image and applying the Pixelize effect, and changing the horizontal and vertical size of the pixels, you will get the desired result. You can check out this feature in the demo here.
Заключение
In this tutorial, we learned how to pixelate an image in JavaScript. By using the HTML5<canvas>, it was a reasonably smooth task. With just a few lines of code and by harnessing the HTML5<canvas>functions, you can quickly obtain your desired result. On the other hand, achieving decent performance on large images may quickly become a challenge. Also, you might not want to spend too much time optimizing your algorithms. In this case, you should adopt a more performant, advanced, and complete solution – such as CreativeEditorSDK. Thanks for reading! We hope that you found this article helpful. Feel free to reach out to us on Twitter with any questions, comments, or suggestions.